

How to Inoculate a Mushroom Grow Bag with Liquid Culture: Step-by-Step Guide
Inoculating a mushroom grow bag with liquid culture is one of the simplest ways to begin growing gourmet mushrooms at home. A prepared syringe allows living mushroom mycelium to be introduced through a self-healing injection port while the sterile grow bag remains sealed.
This step-by-step guide explains how to prepare your workspace, attach the sterile 18G needle, clean the injection port, inject the liquid culture correctly and care for the bag during colonisation.
Quick Answer
- Inspect the unopened grow bag for damage.
- Clean your work surface and wash your hands.
- Gently distribute the mycelium through the liquid culture syringe.
- Attach a new sterile 18G needle without touching the needle shaft or tip.
- Wipe the injection port and allow it to dry.
- Insert the needle through the centre of the port.
- Inject the recommended amount into several nearby areas of the lower grain layer.
- Remove the needle carefully and keep the bag sealed during colonisation.
What You Need
Essential Supplies
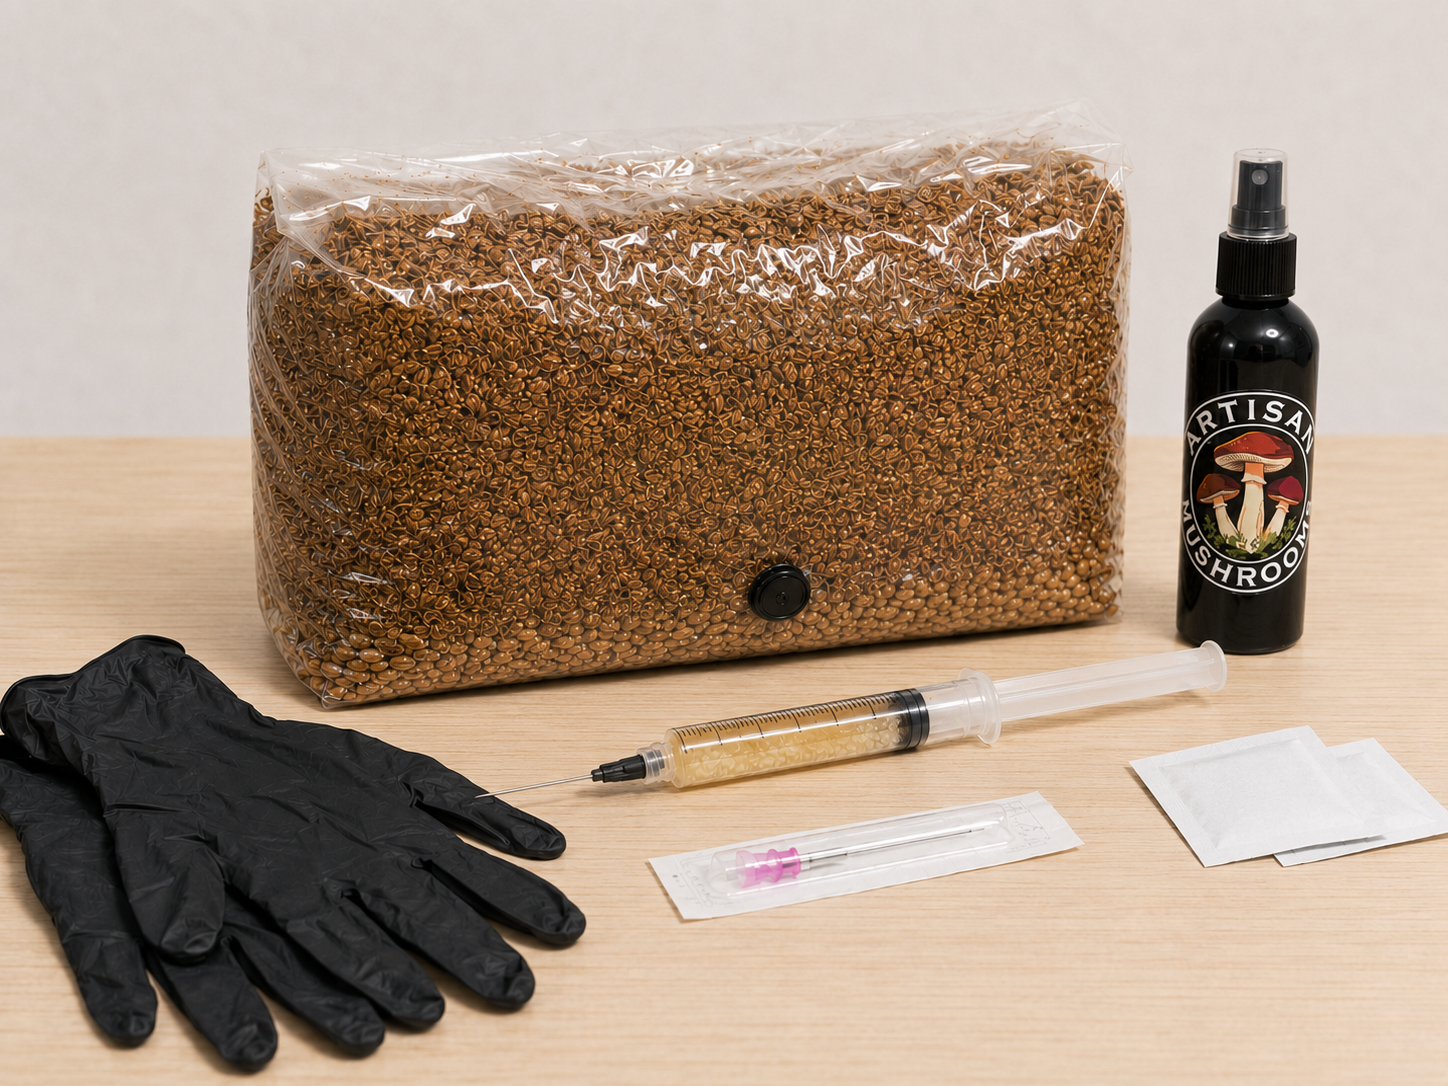
- A healthy mushroom liquid culture syringe
- A sterile hardwood mushroom grow bag
- A new sterile 18G syringe needle
- An alcohol wipe or suitable surface disinfectant
- Clean disposable gloves
- A clean, stable work surface
Helpful Extras
- A fine-mist spray bottle for cleaning the work area
- A clean face covering to reduce droplets near the workspace
- A permanent marker for recording the species and inoculation date
- A thermometer for monitoring incubation temperature
About the Artisan Mushrooms Grow Bag
The sterile hardwood mushroom grow bag contains approximately 2 kg of hydrated, pressure-sterilised hardwood substrate supplemented with wheat bran. It includes a self-healing injection port and filter patch, so it can be inoculated without opening the bag.
Select a compatible species from the mushroom liquid culture range.
Before You Begin
Inspect the Grow Bag
Check the bag before inoculation. The plastic, heat seal, filter patch and injection port should all be intact.
Do not inoculate a bag with a visible puncture, torn seam, loose port, damaged filter patch or leaking substrate. Minor creases and trapped air are normal.
Allow a Cold Bag to Reach Room Temperature
If the grow bag has been stored somewhere cold, allow it to return to a normal room temperature before inoculation. Injecting very cold substrate may slow the culture’s initial recovery.
Do not heat the bag and do not place it in direct sunlight.
Choose a Clean Indoor Workspace
Use a clean table away from open windows, fans, pets, houseplants, food preparation and visible mould. Turn off anything that creates strong air movement while you work.
You do not need to open the grow bag, so this process is much simpler than an open agar or grain transfer. Clean handling still matters because the syringe, needle and injection port are the points closest to the sterile substrate.
How to Prepare the Liquid Culture Syringe
Step 1: Wash Your Hands and Put On Clean Gloves
Wash your hands thoroughly and dry them with a clean towel. Put on clean disposable gloves, then avoid touching your face, phone, clothing or other unclean objects.
Gloves do not replace handwashing. They simply provide a clean surface that can be changed easily if contaminated.
Step 2: Clean the Work Surface
Remove unnecessary items from the table. Clean the surface with an appropriate disinfectant and allow it to dry.
Place the unopened grow bag, liquid culture syringe, sterile needle packet and alcohol wipe within easy reach. Keep the needle sealed until immediately before use.
Step 3: Distribute the Mycelium Through the Syringe
Liquid culture may contain visible strands or clusters of white mycelium. Gently rotate, roll or shake the syringe until the mycelium is distributed more evenly through the liquid.
Do not strike the syringe against a hard surface. A dense clump may block the needle if the culture is not mixed before use.
Step 4: Attach the Sterile 18G Needle
- Open the sterile needle packet carefully.
- Hold the needle only by its plastic hub or protective cap.
- Remove the cap from the liquid culture syringe.
- Attach the needle securely to the syringe.
- Keep the protective needle cap in place until you are ready to inoculate.
Do not touch or wipe the sterile needle. Alcohol does not make a touched needle sterile again. Use a new sterile needle if it contacts an unclean surface.
Individual liquid culture syringes include one sterile 18G needle and one alcohol wipe. Replacement 18G sterile syringe needles are also available separately.
How to Inoculate the Grow Bag
Step 5: Clean the Self-Healing Injection Port
Locate the small black self-healing injection port on the front of the grow bag.
- Wipe the complete surface of the port with an alcohol wipe.
- Avoid touching it again.
- Wait until the alcohol has visibly evaporated.
Allowing the port to dry is important. Do not insert the needle through a visibly wet pool of alcohol.
Step 6: Remove the Needle Cap
Pull the protective cap straight off without touching the metal needle. Keep the needle away from the table, gloves, bag plastic and other objects.
Once the cap has been removed, proceed directly to inoculation rather than leaving the exposed needle sitting in the workspace.
Step 7: Insert the Needle Through the Centre of the Port
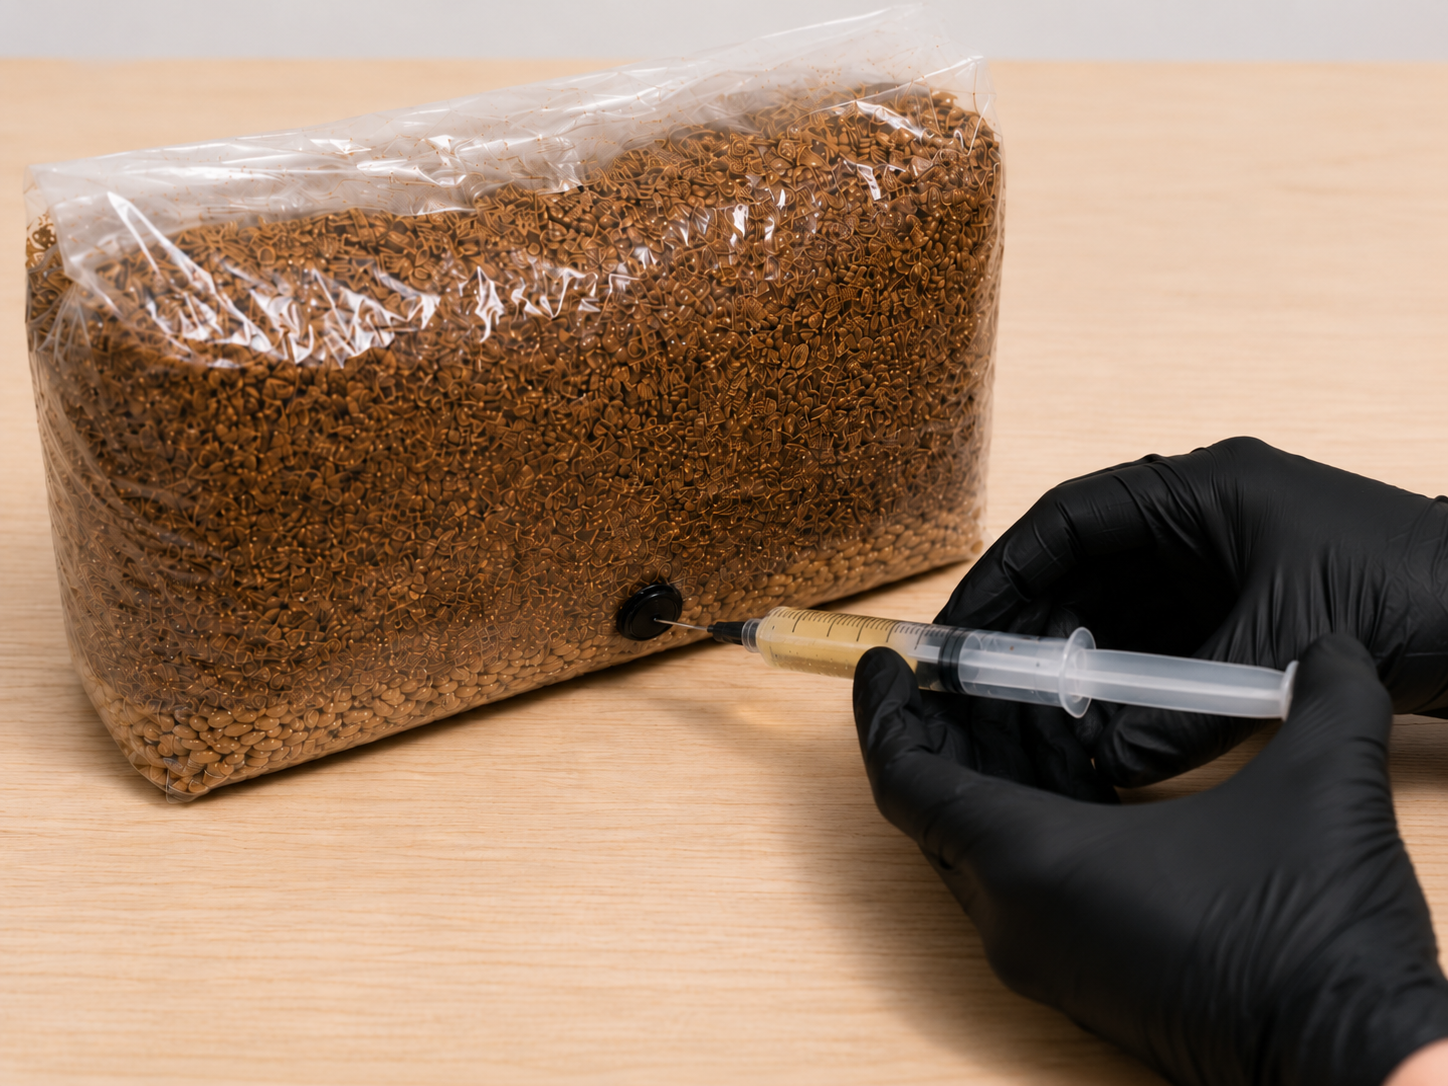
Hold the grow bag steady with one gloved hand. With the other hand, insert the needle straight through the centre of the self-healing injection port.
Do not inject through the clear plastic beside the port. Avoid pushing the needle so deeply or forcefully that it could puncture the opposite side of the bag.
Step 8: Inject into Several Nearby Areas
Keep your thumb positioned on the end of the fully extended plunger. Slowly press the plunger while directing small amounts of culture into several nearby areas of the lower grain layer.
You can carefully adjust the needle angle while it remains inside the same injection port. This creates several starting points without making extra punctures.
Use the quantity recommended for the particular bag and culture. More liquid does not always mean faster colonisation, and excessive liquid can create overly wet areas.
Step 9: Remove the Needle Carefully
Withdraw the needle in a smooth, straight movement. The flexible injection port should close around the puncture.
Do not twist the needle, enlarge the puncture or remove the port from the bag. The port does not normally need tape after inoculation.
Keep the Grow Bag Sealed
The filter patch provides gas exchange during colonisation. Do not open the top of the bag, cut the plastic, cover the filter patch or inject through the filter patch.
What to Do After Inoculation
Label the Bag
Write the mushroom species and inoculation date on the outside of the bag or on a separate label. This makes it easier to compare progress and avoid mixing up several cultures.
Do not write over the filter patch or damage the bag with a sharp pen.
Place the Bag in a Clean Incubation Area
Keep the bag upright on a clean shelf with space around the filter patch. Choose a stable indoor location away from direct sunlight, radiators, damp floors, strong draughts and large temperature changes.
A general colonisation range of approximately 20°C to 25°C suits many hardwood-loving gourmet mushrooms, but always follow the temperature requirements of the selected species.
Do Not Mist the Sealed Bag
The unopened grow bag already contains correctly hydrated substrate. It does not need misting during colonisation.
Humidity management begins later, after the block is colonised and the correct fruiting opening has been made.
Leave the Filter Patch Unobstructed
The filter patch allows the growing mycelium to exchange gases while helping prevent airborne contaminants from entering.
Do not cover the patch with tape, allow it to remain wet, press it tightly against the substrate or store the bag with no air space around it.
When Should Mycelium Become Visible?
Early Growth Can Take Several Days
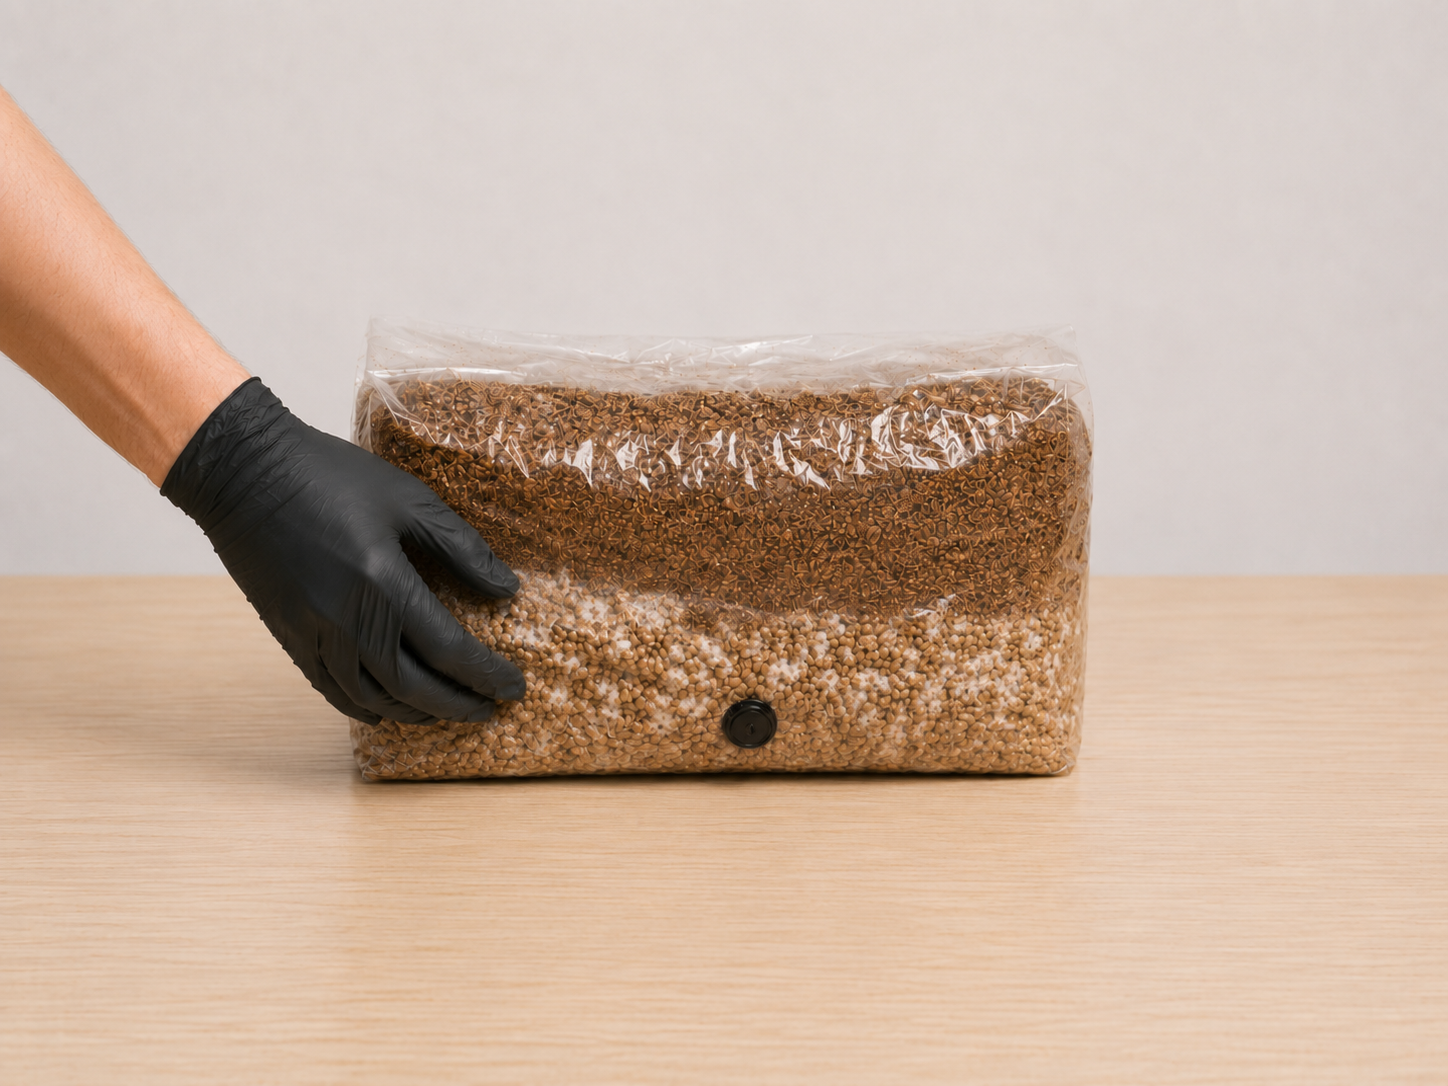
Visible growth may appear within several days, but some bags can take one to two weeks before mycelium becomes easy to see. Growth may begin inside the substrate before reaching the clear surface of the bag.
Fast-growing Oyster mushrooms usually show progress sooner than slower species such as Shiitake, Maitake or Reishi.
What Healthy Mycelium Looks Like
Healthy mushroom mycelium is usually white or cream-coloured. Depending on the species, it may appear fine and wispy, cotton-like, rope-like, patchy or dense.
Lion’s Mane and Shiitake can look finer and less solidly white than Oyster mushroom mycelium. Shiitake may later develop normal brown colouring as the mature block forms.
Should You Break Up or Massage the Bag?
It is not normally necessary to break up a hardwood grow bag. Hardwood fruiting substrate is generally allowed to colonise and consolidate into a firm block.
Aggressive mixing can compact the substrate, damage the filter patch, puncture the plastic or break developing mycelial connections. For most beginners, the safest choice is to leave the sealed bag undisturbed.
How Long Complete Colonisation Takes
Complete colonisation may take approximately four to twelve weeks, depending on the mushroom species, temperature, culture vigour, substrate density and inoculation method.
Some species also need additional maturation after they appear colonised. Shiitake should normally popcorn and brown, while Maitake, Reishi and Chestnut may benefit from additional consolidation.
Do Not Keep Adding More Culture
If growth is slow, check the species and incubation temperature before assuming the inoculation has failed. Repeatedly injecting more liquid culture can increase moisture and contamination risk.
Read the liquid culture dosage guide for more information about choosing an appropriate quantity.
Signs of Possible Contamination
Unusual Colours
Spreading green, black, pink, red or rapidly developing grey growth can indicate contamination. Isolate the bag from other mushroom cultures and keep it sealed.
Wet, Slimy or Sour Areas
Large wet patches, greasy grain, stalled growth or a sour smell can indicate bacterial contamination. Do not open the bag indoors to investigate.
Normal Condensation and Metabolites
A moderate amount of condensation can be normal because growing mycelium produces heat. Small clear, yellow or amber droplets may be fungal metabolites and do not automatically mean the bag is contaminated.
Compare suspicious growth using the mushroom contamination guide.
Common Beginner Mistakes
Touching the Sterile Needle
Once the protective cap is removed, the needle should not touch gloves, the table, the outside of the bag or any other surface.
If it touches something unclean, replace it with a new sterile needle rather than wiping it and continuing.
Injecting Before the Alcohol Dries
Wipe the self-healing injection port thoroughly, then wait until the alcohol has evaporated before inserting the needle.
Do not touch the cleaned port again with your fingers.
Injecting Through the Bag Plastic
Always insert the needle through the centre of the black injection port. A needle hole in the clear plastic does not reseal and can allow contaminants to enter.
Using Too Much Force
Insert and remove the needle carefully. Aggressive movement can damage the port, puncture the opposite side of the bag or tear the plastic.
Opening the Bag During Colonisation
The grow bag should remain sealed while the mycelium colonises the substrate. The filter patch provides the gas exchange required during this stage.
Only open or cut the bag when the block is fully colonised and ready for the fruiting method required by the mushroom species.
Keeping the Bag Too Warm
Actively growing mycelium produces heat, so the substrate can become warmer than the surrounding room. Avoid radiators, hot presses, direct sunlight and tightly packing several colonising bags together.
Frequently Asked Questions
Can I Use the Full 10 ml Liquid Culture Syringe?
Follow the instructions for your particular grow bag and culture. The current Artisan Mushrooms 2 kg hardwood grow bag guidance allows approximately 5 to 10 ml, provided the culture is clean and the substrate is correctly hydrated.
More liquid does not guarantee faster colonisation. Distribute the culture across several nearby areas instead of creating one wet pocket.
Why Is the Liquid Culture Not Coming Through the Needle?
A clump of mycelium may be blocking the needle. Gently distribute the culture before use and apply steady pressure to the plunger.
Do not force the plunger aggressively. Replace the needle if it remains blocked or becomes damaged.
Do I Need to Flame-Sterilise a New Needle?
No. An individually packaged sterile needle is ready to use when its packet is opened correctly.
Keep it sealed until immediately before inoculation and avoid touching the needle. Treat it as a single-use item.
Should I Put Tape Over the Injection Port Afterwards?
No. A sound self-healing injection port should close around the puncture after the needle is removed.
Do not remove the port or cover the filter patch.
Does the Grow Bag Need Complete Darkness?
No. Complete darkness is not essential for most gourmet mushroom species. Normal indirect room light is generally acceptable during colonisation.
Avoid direct sunlight because it can overheat the bag and create damaging temperature changes.
What If I See No Growth After One Week?
Some cultures become visible within several days, while others can take one to two weeks. Growth may also begin inside the block where it cannot yet be seen.
Check that the temperature suits the mushroom species and avoid injecting more culture immediately.
Can I Reuse the Needle for Another Bag?
Use a new sterile needle for each unrelated culture or inoculation project. Reusing needles can transfer contamination or mix mushroom cultures.
Start Your Mushroom Grow
A prepared liquid culture and ready-to-inoculate hardwood grow bag remove the most difficult substrate preparation and sterilisation stages. Clean the workspace, use the supplied sterile 18G needle, inject through the centre of the port and leave the bag sealed while the mycelium grows.