

How to Grow King Blue Oyster Mushrooms: Complete Growing Guide
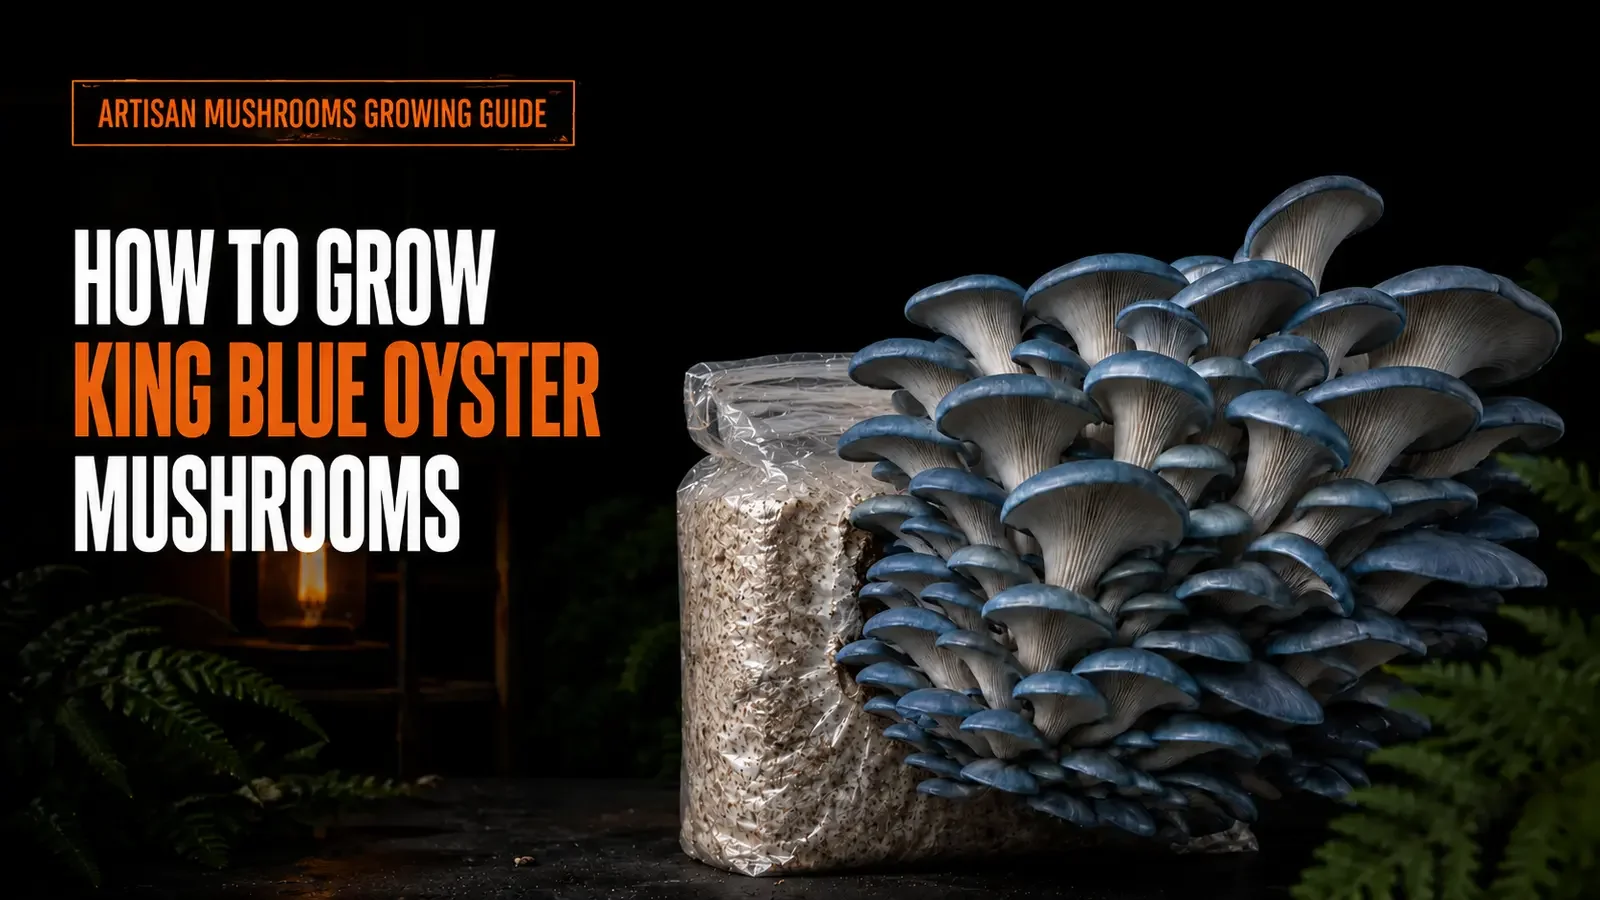
King Blue Oyster mushrooms sit neatly between two familiar forms: the crowded blue-grey clusters of a Blue Oyster and the firmer, more substantial fruiting bodies associated with King Oyster. They colonise vigorously, fruit well from a small side opening and give growers useful control over the final stem-to-cap balance.
Quick answer: easiest method
For most beginners, the simplest route is King Blue Oyster liquid culture with an Artisan Mushrooms all-in-one hardwood grow bag. Inject through the self-healing port into the lower grain layer, allow healthy white mycelium to establish through the grain, then mix the colonised grain through the hardwood and wheat-bran substrate while the bag remains sealed. Wait until the whole block is fully colonised before making one small X-shaped side opening for fruiting.
Simple route: King Blue Oyster liquid culture → lower grain layer → colonise grain → mix through hardwood → full block colonisation → side fruit → harvest.
King Blue Oyster at a glance
| Type | A cultivated Oyster hybrid/strain commonly described as Pleurotus eryngii × Pleurotus ostreatus var. columbinus |
|---|---|
| Difficulty | Beginner-friendly with prepared sterile substrate |
| Best indoor substrate | Sterilised hardwood sawdust or pellets supplemented with wheat bran |
| Colonisation temperature | Approximately 20-24°C |
| Fruiting temperature | Approximately 12-18°C; cooler conditions usually deepen cap colour |
| Humidity | 90-95% while pinning, then roughly 85-90% as clusters expand |
| Fresh air | Regular exchange; more for broad caps, slightly less for heavier stems |
| Bag opening | One 4-6 cm X-shaped side cut |
| Harvest | Before the largest cap edges curl strongly upwards |
What are King Blue Oyster mushrooms?
King Blue Oyster is a cultivated hybrid or trade strain rather than a separate wild species. The name is used for genetics that combine Blue Oyster characteristics with a more substantial, King-like build. Young caps can be deep slate blue, becoming steel grey or silver grey as they expand. Stems are generally firmer and meatier than those of an ordinary Blue or Pearl Oyster.
Exact shape varies between genetics and growing rooms. Temperature, light, the size of the side opening and especially carbon dioxide influence whether you get broad overlapping caps or longer, heavier stems.
King Blue Oyster vs Blue Oyster vs King Oyster
| Feature | King Blue Oyster | Blue Oyster | King Oyster |
|---|---|---|---|
| Typical form | Dense cluster with substantial stems and blue-grey caps | Large bouquet of thinner-stemmed fan-shaped caps | Fewer individual mushrooms with very thick stems |
| Fresh-air demand | Moderate to high, depending on desired form | High | Controlled; tolerates more CO₂ around developing fruits |
| Fruiting opening | Small side X | Small side X or slit | Usually an open top with a collar |
| Colour | Blue-grey when young, paling with warmth and maturity | Blue to grey, strongest in cool conditions | Pale stem with tan to brown cap |
Why King Blue Oyster should be side-fruited
A small side opening suits the natural clustered growth of King Blue Oyster. It concentrates the block's water and energy into one bouquet, supports the weight of the mushrooms and leaves most of the substrate protected by plastic.
Press all loose air from the bag, flatten the unused plastic, fold it down several times against the top or back of the block and make one X-shaped cut about 4-6 cm across on a broad side. Removing the air pocket keeps fruiting concentrated at the cut, while the X-shaped flaps hold humidity at the surface and let the pins push out.
Best substrate for King Blue Oyster
For dependable indoor results, use hardwood sawdust or hardwood pellets supplemented with wheat bran. Oak and beech are both suitable. Hardwood supplies the woody material the mycelium digests, while bran adds nutrition and supports a stronger crop.
Because supplemented hardwood is nutrient-rich, it must be sterilised rather than simply soaked. The simplest route is an Artisan Mushrooms all-in-one hardwood grow bag. Inject liquid culture into the lower grain layer first, allow the grain to colonise, then mix that colonised grain through the hardwood and wheat-bran substrate inside the sealed bag. Growers using separate grain spawn can instead mix fully colonised grain into sterilised hardwood and wheat-bran substrate.
Can King Blue Oyster grow on straw?
Yes. Clean chopped straw that has been correctly pasteurised can produce good clusters. Supplemented hardwood generally supports a firmer, meatier crop and gives home growers a more predictable indoor block.
Temperature, humidity and lighting
| Stage | Temperature | Humidity | Light and air |
|---|---|---|---|
| Colonisation | 20-24°C | Normal room humidity; bag sealed | Low ambient light is fine; keep filter patch clear |
| Pin initiation | 12-18°C | 90-95% RH | Indirect light and regular fresh air |
| Cluster development | 12-18°C | 85-90% RH | Increase fresh air if stems begin stretching |
Cooler fruiting usually produces the strongest blue-grey caps. Warmer conditions can still fruit, but caps often become paler and growth may be less compact. Avoid direct sunlight, radiators and cold draughts that repeatedly dry the side opening.
Use soft daylight from a nearby window or a simple white LED on a roughly 12-hour cycle. Light guides normal cap development; it does not need to be intense.
CO₂ and fresh-air control: shaping stems and caps
King Blue Oyster gives growers more control than Pearl Oyster, but it still needs oxygen. The aim is not to trap stale air. It is to balance fresh air with humidity around the single side-fruiting cluster.
For broad blue-grey caps
Provide frequent gentle exchange. Caps should widen each day, stems should remain proportionate and gills should develop cleanly. If you monitor CO₂, keeping it roughly below 800-1,000 ppm is a useful target for a classic Oyster form.
For heavier stems
Allow moderately higher CO₂ early in development, then increase air as the caps expand. This can produce firmer stems without changing the side-fruiting method. Once stems become thin, twisting or antler-like, air is too stale.
How much fresh air does it need?
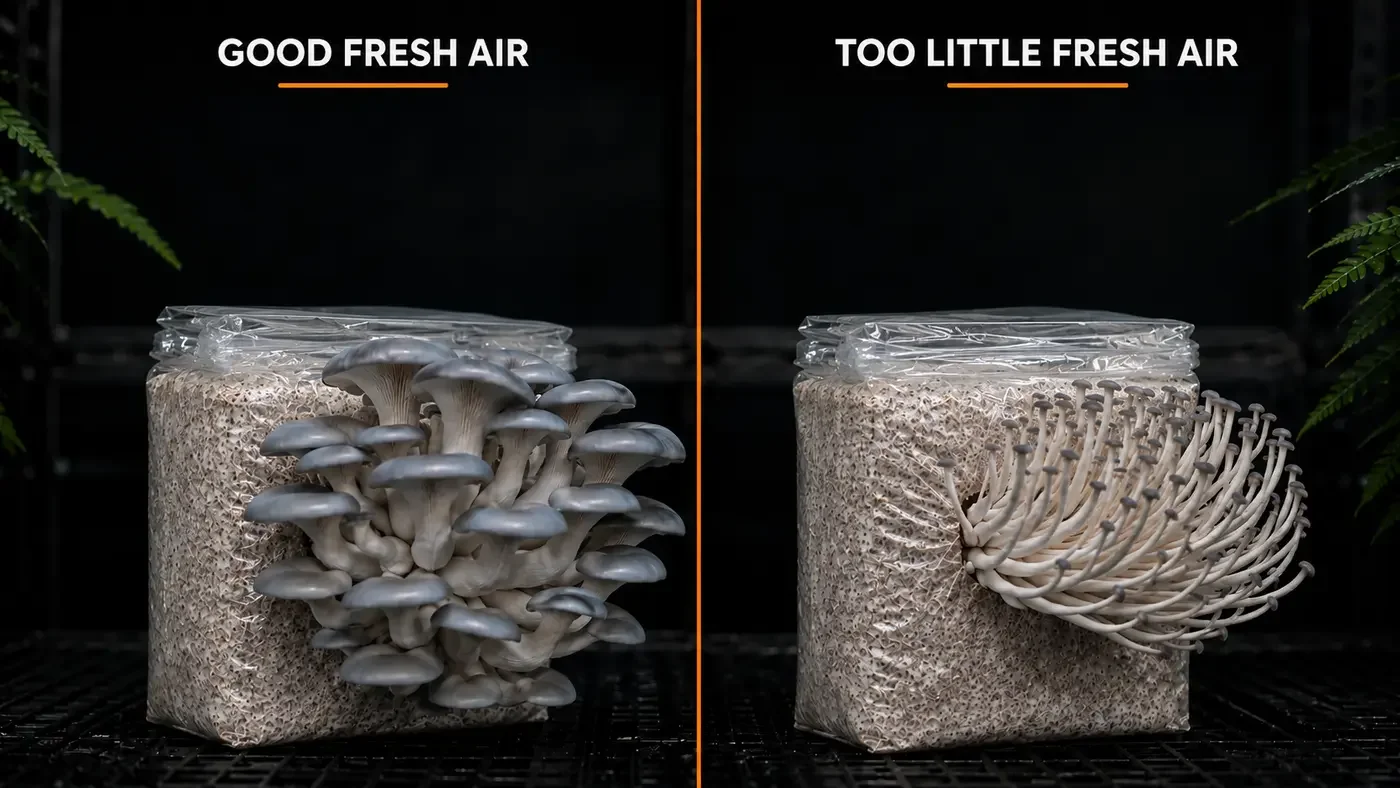
In a small fruiting chamber, replace the air several times through the day rather than giving one strong blast. In an automated tent, use a gentle exhaust cycle that prevents CO₂ collecting at shelf level. Oyster mushrooms breathe continuously, and stale air can gather around the block even when the top of the chamber seems fresh.
- Good balance: caps widen daily, stems remain stout, colour is blue-grey and the cluster smells fresh.
- Too little air: long narrow stems, tiny caps, fuzzy bases and a crowded upward-reaching form.
- Too much dry air: cracked cap edges, stalled pins and a leathery surface.
Increase ventilation and humidification together. Simply opening the chamber may correct CO₂ while ruining humidity, so mist the chamber walls or improve humidification instead of soaking the mushrooms directly.
How to grow King Blue Oyster mushrooms step by step
- Choose the easiest route. Pair King Blue Oyster liquid culture with an all-in-one hardwood grow bag. The bag contains a lower grain layer and an upper hardwood and wheat-bran substrate, so the full grow can be completed without a separate grain-to-substrate transfer.
- Clean the workspace. Wash your hands, clean the work surface and wipe the self-healing injection port with alcohol. Allow the port to dry, then attach a fresh sterile needle only when you are ready to inoculate.
- Inject the lower grain layer. Shake the liquid culture gently to distribute the mycelium, insert the needle through the self-healing port and direct the liquid into the grain at the bottom of the bag. Do not aim the culture into the hardwood layer.
- Let the grain establish first. Keep the bag sealed, upright and away from direct sunlight. Do not cover the filter patch. Allow healthy white King Blue Oyster mycelium to become clearly established through the lower grain layer before mixing.
- Break and redistribute the grain. When roughly 20 to 30% of the grain shows healthy white growth, gently break up the colonised grain through the unopened plastic and redistribute it through the grain section only. Let it recover and continue colonising.
- Mix the colonised grain through the hardwood. Once the lower grain layer is mostly or fully colonised, break it apart and mix it evenly through the hardwood and wheat-bran substrate above. Keep the bag sealed throughout this step, then lightly reform the contents into a compact block.
- Wait for full block colonisation. Return the mixed bag to stable colonisation conditions. Do not fruit it until the hardwood block is firm and evenly colonised, with no large loose or uncolonised areas remaining.
- Prepare one side-fruiting site. Press out the loose air above the block, flatten and fold the spare plastic down tightly, then make one 4 to 6 cm X-shaped cut against a broad side of the fully colonised block.
- Introduce fruiting conditions. Move the block to approximately 12 to 18°C with 90 to 95% humidity for pinning, gentle indirect light and regular fresh-air exchange. Freezing or prolonged refrigeration is unnecessary.
- Protect the pins. Maintain humid air around the opening rather than soaking the young mushrooms. Mist the chamber walls or surrounding air as needed.
- Adjust fresh air as the caps develop. If stems become long and narrow while caps stay small, increase fresh-air exchange. Strong King Blue clusters should retain substantial stems without becoming thin or antler-like.
- Harvest the complete cluster. Harvest while the caps are firm and before their edges curl strongly upward or the cluster begins releasing a heavy spore load.
When is the substrate ready to fruit?
A ready block looks evenly white or cream, feels firm and holds together as one mass. Healthy Oyster mycelium may be fluffy in places and denser in others. A few small amber metabolites can appear on an older block without meaning it is contaminated.
Do not cut a block because the outside turned white first. The centre may still be uncolonised. Fruiting early reduces yield and gives contaminants access to unused nutrition.
How to cut a King Blue Oyster grow bag
Push all surplus air out, flatten the loose upper plastic and fold it down several times against the top or back of the block. The finished bag should feel compact, with no large air pocket above the substrate. Make one X about 4-6 cm across on a broad side, close against the substrate. Do not remove a large square of plastic; the flaps help retain surface moisture while pins push through.
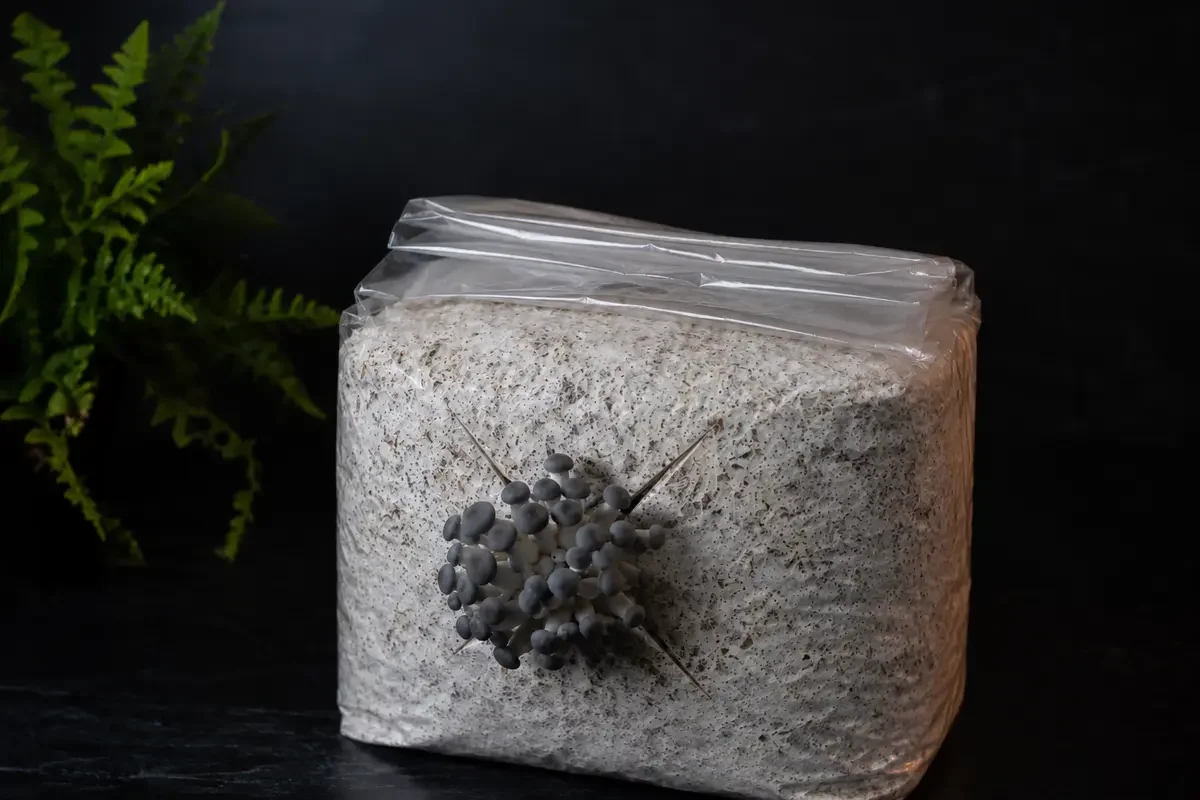
Place the bag so the cut faces open space rather than a wall. The developing bouquet becomes heavy and needs room to project outward and upward without rubbing against the chamber.
How to initiate pinning
Pinning is triggered by full maturity, oxygen, evaporation, light and a suitable temperature change. Move the consolidated block to fruiting conditions and keep the air around the side cut humid. Tiny dark knots or clusters often appear within one to three weeks.
- Keep pinning humidity near 90-95%.
- Provide a clear day/night light rhythm.
- Replace stale air without blowing a fan directly at the cut.
- Keep large droplets off the pins.
- Do not enlarge the opening or keep moving the bag.
Common King Blue Oyster problems and fixes
| Problem | Likely cause | What to do |
|---|---|---|
| No pins after two weeks | Block not mature, air too stale, temperature too warm or cut too dry | Confirm complete colonisation, aim for 12-18°C, restore humidity and increase gentle air exchange |
| Long stems and tiny caps | Excess CO₂ | Increase exchange frequency and ensure exhaust reaches the lower part of the chamber |
| Pale or nearly white caps | Warm fruiting, maturity or weak light | Fruit cooler if practical and provide consistent indirect light; colour naturally fades with age |
| Dry, cracked cap edges | Low humidity or direct fan | Raise ambient humidity and redirect airflow away from the cluster |
| Yellow or brown wet patches | Standing water or bacterial stress | Stop direct misting, improve air movement and prevent condensation dripping onto mushrooms |
| Many pins abort | Too many fruits or fluctuating conditions | Keep one side opening and stabilise humidity and temperature |
| Fuzzy stem bases | Usually elevated CO₂ | Increase fresh air; a small amount of white fuzz at the base is not contamination |
| Green mould | Contamination | Seal and isolate the bag. Do not open it in the fruiting room |
When and how to harvest
Harvest when the largest caps have opened but still feel firm, with edges that are mostly flat or only beginning to lift. Very mature caps become paler, flatten completely and release far more spores.
Support the cluster at its base, twist gently and pull it away in one piece. If it resists, cut it flush with a clean knife. Trim away substrate before cooking or storing. Removing the entire base leaves a clean side opening for the next flush.
Second flush and expected harvests
A healthy block normally produces two useful flushes, and sometimes a smaller third. The first is usually the largest. After harvesting, remove loose stem material and let the block rest for roughly 7-14 days.
If the block feels noticeably lighter, rehydrate it by soaking in clean cold water for several hours, then drain thoroughly. Do not leave water pooled inside the bag. Return it to fruiting conditions with the original side cut exposed; new pins commonly form from the same opening.
Storage after harvest
Do not wash the mushrooms before refrigeration. Brush off substrate, place the cluster in a paper bag or breathable container and refrigerate promptly. They are usually best within five to seven days. Avoid sealing wet mushrooms in airtight plastic, where condensation can make them slimy.
For longer storage, slice and dry thoroughly or cook and freeze. King Blue Oyster has a firm texture and responds particularly well to hot pan-searing.
King Blue Oyster mushroom growing FAQs
What is a King Blue Oyster mushroom?
It is a cultivated Oyster hybrid or strain commonly described as combining King Oyster and Blue Oyster genetics. It forms blue-grey caps, dense clusters and firmer stems than a typical Blue Oyster.
Is King Blue Oyster the same as King Oyster?
No. King Oyster is Pleurotus eryngii and normally forms separate trumpet-shaped mushrooms. King Blue is more vigorous and grows as a clustered Oyster from a side opening.
What is the best substrate for King Blue Oyster?
Sterilised hardwood sawdust or pellets supplemented with wheat bran is a dependable indoor substrate. Properly pasteurised straw can also work.
What temperature does King Blue Oyster need?
Colonise at approximately 20-24°C and fruit at roughly 12-18°C. Cooler fruiting usually produces deeper blue-grey caps.
How much humidity does King Blue Oyster need?
Aim for about 90-95% while pins form, then roughly 85-90% as the cluster grows. Fresh air remains essential even when humidity is high.
Does King Blue Oyster need more fresh air than Pearl Oyster?
Usually not. It is more tolerant of moderately elevated CO₂ and can use it to build heavier stems. For broad caps, however, it still needs frequent exchange.
Where should I cut a King Blue Oyster grow bag?
Make one X-shaped cut about 4-6 cm across on a broad side of the fully colonised block. Press the plastic against the substrate and place the cut where the cluster has room to grow outward.
Why are my King Blue Oyster mushrooms growing long stems?
Long narrow stems with very small caps usually mean CO₂ is too high. Increase fresh-air exchange. Thick, proportionate stems are desirable; thin antler-like stems are not.
Why have the blue caps turned grey or white?
Caps naturally pale as they mature, and warmer fruiting also reduces blue colour. Consistent indirect light and cooler conditions help retain deeper tones.
How long does King Blue Oyster take to colonise?
Grain often takes around two to four weeks, depending on inoculation rate and temperature. A hardwood block may need another two to four weeks. Judge readiness by complete growth, not the calendar alone.
How long after cutting the bag will mushrooms appear?
Healthy mature blocks commonly pin within one to three weeks. Once pins establish, clusters can develop quickly and may be ready within roughly five to ten days.
Can I grow King Blue Oyster from liquid culture?
Yes. Liquid culture can inoculate sterile grain or a ready-to-inoculate hardwood grow bag through its injection port. Do not inject unsterilised bulk substrate directly.
How many flushes will a King Blue Oyster block produce?
Two worthwhile flushes are common, with a possible smaller third if the block remains healthy and hydrated.
When should King Blue Oyster mushrooms be harvested?
Harvest while the caps are firm and before their edges curl strongly upwards. Earlier harvesting also reduces the amount of spores released indoors.
Useful supplies for this grow
A fresh 10 ml culture for inoculating sterile grain or a prepared grow bag.
The easiest route: inject the lower grain layer first, then mix the colonised grain through the hardwood inside the sealed bag.
Use liquid culture to make vigorous King Blue Oyster grain spawn first.
Prepared bulk substrate for mixing with fully colonised grain spawn.
A useful learn-first option for new growers who want an introduction to inoculation, colonisation and fruiting.
Related growing guides
Cultivation references
© 2026 Artisan Mushrooms Ireland. Original article and images. May not be copied or redistributed without written permission.
