

How to Grow King Oyster Mushrooms: Complete Growing Guide
How to Grow King Oyster Mushrooms: Complete Growing Guide
King Oyster mushrooms are famous for their thick, meaty stems and neat brown caps. They are not the fastest or most forgiving Oyster mushroom, but with a fully colonised hardwood block, cool fruiting conditions and sensible control of humidity and fresh air, they are very achievable at home.

Quick answer: easiest method
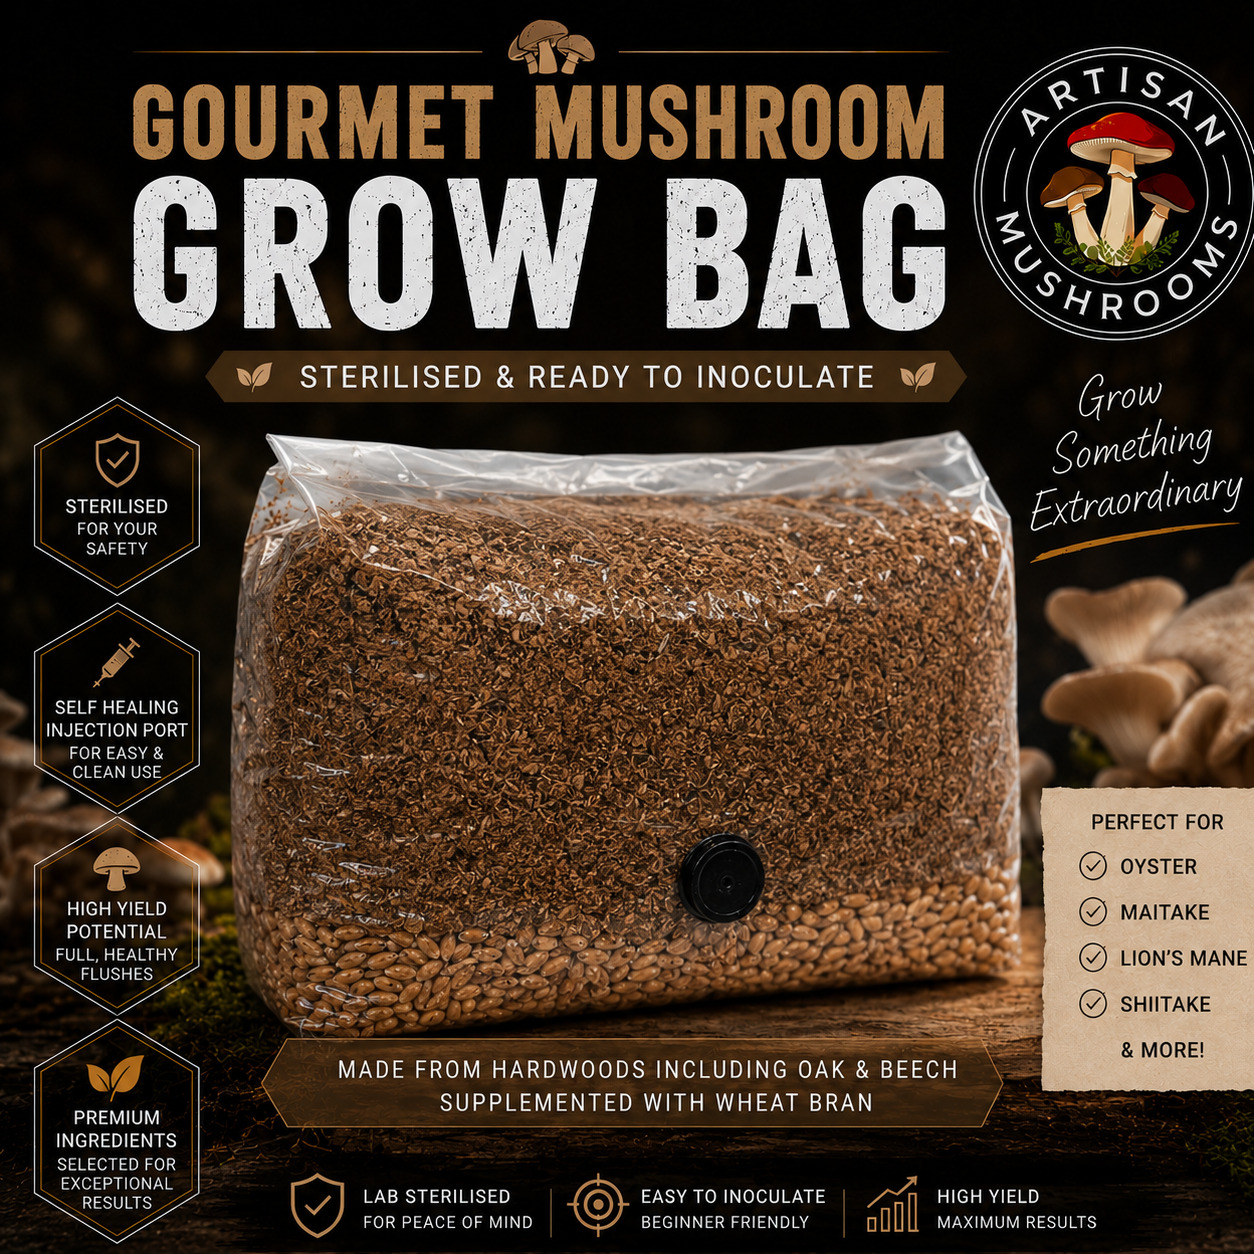
For most beginners, the simplest route is to pair King Oyster liquid culture with an Artisan Mushrooms all-in-one hardwood grow bag. Inject through the self-healing port into the lower grain layer, allow the grain to establish, then mix the colonised grain through the hardwood and wheat-bran substrate while the bag stays sealed. Wait until the whole block is fully colonised, then open the top and leave a short plastic collar for fruiting.
Simple route: King Oyster liquid culture → lower grain layer → colonise grain → mix through hardwood → full block colonisation → top fruit → harvest.
King Oyster mushrooms at a glance
| Scientific name | Pleurotus eryngii |
|---|---|
| Also called | King Trumpet, Royal Trumpet or French Horn mushroom |
| Difficulty | Beginner to intermediate; more demanding than Pearl Oyster |
| Preferred substrate | Sterilised hardwood sawdust or pellets supplemented with wheat bran |
| Colonisation temperature | About 20-24°C; avoid overheating the centre of the block |
| Fruiting temperature | About 13-18°C, with 14-17°C a useful target for compact, firm mushrooms |
| Humidity | About 90-95% for pinning, then roughly 85-90% as mushrooms enlarge |
| Fruiting style | Usually top fruited through a short plastic collar |
| Harvest signal | Stems are thick and firm; caps are still slightly rounded and have not curled upwards |
What are King Oyster mushrooms?
King Oyster is the largest commonly cultivated member of the Oyster mushroom group. Instead of forming broad shelves of overlapping caps, it normally produces substantial individual mushrooms with thick white stems and compact tan or brown caps.
The stem is the main attraction. It is dense, firm and pleasantly chewy when cooked, so the entire mushroom is useful rather than the stem being treated as waste. King Oysters also keep their texture well after harvest and generally have a longer shelf life than delicate, thin-capped Oyster mushrooms.
In the wild, Pleurotus eryngii is associated with the roots and remains of certain herbaceous plants, particularly members of the carrot family. In cultivation, however, it performs very well on properly prepared hardwood-based substrates.
Why King Oysters are different from other Oyster mushrooms
They are normally top fruited
Pearl and Blue Oysters are often fruited through a small X-shaped side cut. King Oyster is usually opened across the top so mushrooms can rise vertically from the surface.
They prefer cooler fruiting
King Oyster generally needs a cool fruiting area. Warm conditions can delay pinning and produce softer, less compact mushrooms.
Fresh air changes their market shape
Pearl Oysters need generous fresh air to prevent long stems and undersized caps. With King Oysters, growers deliberately retain a modest amount of carbon dioxide around the developing stems to keep the caps smaller.
Thinning can improve size
If a block produces many pins, leaving only a few of the strongest lets the block direct more water and nutrition into each remaining mushroom.
Best substrate for King Oyster mushrooms
For reliable indoor growing, the best all-round substrate is sterilised hardwood sawdust or hardwood pellets supplemented with wheat bran. Oak and beech are both suitable hardwood bases. The hardwood provides structure and long-term nutrition, while the bran supplies extra nitrogen and supports larger fruiting bodies.
| Substrate | Preparation | Suitability | Practical note |
|---|---|---|---|
| Hardwood and wheat bran | Pressure sterilise | Excellent | Best balance of nutrition, moisture retention and structure |
| Plain hardwood pellets or sawdust | Hydrate and heat treat correctly | Good | Less productive than a well-balanced supplemented mix, but less nutrient-rich |
| Straw | Pasteurise or sterilise as appropriate | Possible | Can work, although supplemented hardwood usually gives denser, better-shaped fruit bodies |
| CVG | Not recommended as the main substrate | Poor choice | King Oyster is better matched to a hardwood-based fruiting substrate |
An Artisan Mushrooms all-in-one hardwood grow bag is the simplest route because it already contains the sterile grain and supplemented hardwood needed for both stages. Inject the lower grain layer first, allow it to colonise, then mix the colonised grain through the hardwood inside the unopened bag. If you already have fully colonised King Oyster grain spawn, use it to inoculate a separate hardwood and wheat-bran bulk substrate.
Temperature, humidity, fresh air and lighting
| Stage | Practical starting conditions | What to avoid |
|---|---|---|
| Grain colonisation | 20-24°C; sealed bag; filter patch unobstructed; normal low room light is fine | Direct sun, radiators, hot cupboards and tightly packed bags |
| Bulk colonisation | 20-24°C; stable room; good gas exchange through the filter | Block temperatures approaching or exceeding 26°C |
| Pin initiation | 13-18°C; 90-95% RH; gentle indirect light; controlled fresh air | Warm rooms, dry draughts, sealed stagnant tubs and water pooling on the surface |
| Fruit-body development | 14-18°C; about 85-90% RH; moderate ventilation adjusted by mushroom shape | Continuously wet caps, very stale air or aggressive drying airflow |
These are useful working ranges, not rigid guarantees. Strain, block size, substrate recipe and the temperature inside the block all influence the result. Actively growing mycelium produces heat, so the centre of a large block can be warmer than the surrounding room.
Lighting
King Oysters do not need strong light. Gentle indirect daylight or a modest artificial light on a regular daytime cycle is enough to support normal pinning and orientation. Avoid direct sunlight, which can overheat and dry the block.
Choose your growing route
Route A: all-in-one hardwood bag, recommended
Inject King Oyster liquid culture through the self-healing port of the all-in-one hardwood grow bag and aim it into the lower grain layer. Let the grain colonise first, then break it up and mix it through the hardwood and wheat-bran substrate while the bag remains sealed. This is the simplest King Oyster route because there is no separate sterile grain-to-substrate transfer.
Route B: liquid culture to grain, then hardwood
Use King Oyster liquid culture to colonise sterilised wheat grain. When the grain is completely colonised and clean, mix it through sterilised hardwood and wheat-bran substrate.
Route C: prepared grain spawn and hardwood
Use fresh King Oyster grain spawn to inoculate the final hardwood substrate. This removes the separate liquid-culture-to-grain stage.
Route D: prepare everything yourself
Experienced growers can formulate, hydrate, bag and sterilise their own supplemented hardwood. Use a tested recipe and verify field capacity rather than relying only on a calculated water amount.
Step-by-step: how to grow King Oyster mushrooms
- Choose the easiest route. Use King Oyster liquid culture with an all-in-one hardwood grow bag.
- Prepare a clean workspace. Wash your hands, clean the work surface, wipe the self-healing injection port with alcohol and allow it to dry.
- Inject the lower grain layer. Shake the liquid culture to distribute the mycelium, attach a fresh sterile needle and inject through the port into the grain at the bottom of the bag. Do not aim the culture into the hardwood layer.
- Let the grain establish. Keep the bag sealed and stable at roughly 20 to 24°C until healthy white King Oyster mycelium is clearly established through the lower grain layer.
- Break and redistribute the grain. When roughly 20 to 30% of the grain shows healthy growth, gently break up the colonised grain through the unopened plastic and redistribute it through the grain section only.
- Mix through the hardwood. Once the grain layer is mostly or fully colonised, break it apart and mix it evenly through the hardwood and wheat-bran substrate above. Keep the bag sealed, then lightly reform the contents into a compact block.
- Colonise the complete block. Wait until the hardwood is thoroughly colonised and the block is firm. Do not begin fruiting while large loose or uncolonised areas remain.
- Open the top of the bag. Cut horizontally above the substrate and leave approximately 7 to 8 cm of plastic standing above the surface as a collar.
- Introduce fruiting conditions. Move the bag into cooler conditions with high humidity, gentle indirect light and controlled fresh air.
- Watch the pin set. Once pins are clearly established, retain the strongest mushrooms if your goal is fewer, larger stems.
- Adjust air by shape. Keep modest local carbon dioxide retention for the classic thick-stemmed form, but increase ventilation if stems become stretched, narrow or misshapen.
- Harvest while firm. Pick before the caps flatten fully or curl upwards.
Inoculation and colonisation
Inoculating a ready-to-inoculate grow bag
- Keep the bag sealed and inspect it for damage.
- Clean your work surface and wash your hands.
- Shake the capped liquid-culture syringe well to distribute the mycelium.
- Attach a new sterile needle without touching the shaft or tip.
- Wipe the self-healing injection port with 70% isopropyl alcohol and let it dry.
- Insert the needle through the centre of the port, aim into the lower grain layer and inject the recommended amount. See the liquid culture dosage guide if needed.
- Withdraw the needle and leave the bag sealed.
Do not puncture the clear plastic or filter patch. Do not add water. The filter patch must remain dry and unobstructed so the mycelium can exchange gases.
What healthy colonisation looks like
- White mycelium spreads steadily outwards from the inoculation points.
- The grain becomes increasingly bound together.
- After mixing, white growth reconnects and spreads through the hardwood.
- The finished block becomes firm and holds its shape.
- There are no strong unusual colours, wet slime or sour odours.
King Oyster can colonise more slowly than aggressive Pearl or Blue Oyster strains. Judge steady progress and cleanliness rather than expecting every bag to follow the same calendar.
When is the substrate ready to fruit?
The block should be thoroughly colonised, white and firm. Small darker flecks of the original hardwood may remain visible through the mycelium, but there should not be broad areas of untouched brown substrate.
If the outside has only just turned white, allow a short consolidation period so the mycelium can finish digesting and linking the substrate internally. A few extra days is often more useful than opening the bag too early.
How to open a King Oyster grow bag for fruiting
King Oyster is usually top fruited. Do not use the small X-shaped side cut commonly used for Pearl Oyster.
- Stand the fully colonised bag upright.
- Cut the bag open horizontally above the top of the substrate.
- Leave roughly 7-8 cm of plastic rising above the surface.
- Fold, roll or tidy the loose plastic so it forms an open collar rather than collapsing onto the block.
- Keep the sides and lower part of the block covered to conserve moisture.
- Move the bag to its fruiting environment.

The collar is not an airtight cover. It creates a small local pocket of humid air around the pinning surface while the room or fruiting chamber still receives ventilation.
How to initiate pinning
Pinning is encouraged by a combination of full colonisation, a drop into the fruiting-temperature range, high humidity, light and access to fresh air.
- Confirm that the block is fully colonised and healthy.
- Lower the temperature gradually into roughly the 13-18°C range.
- Raise humidity around the open surface to approximately 90-95%.
- Provide gentle indirect light on a consistent daily cycle.
- Ventilate the surrounding space without aiming a drying draught into the bag.
- Keep the collar in place and wait for compact pins to appear across the top.
A severe cold shock is not required. Moving a mature block from warm colonisation into a cooler fruiting environment is normally enough. Do not freeze the block.
CO₂ and fresh-air control: shaping thick stems and smaller caps
This is the most important difference between growing King Oyster and growing Pearl Oyster.
Mushrooms release carbon dioxide as they respire. In a poorly ventilated space, it accumulates around the fruit bodies. Oyster mushrooms change shape in response. Pearl Oysters normally react with long stems and small caps, which growers treat as a warning to provide more air. King Oysters are different because a longer, substantial stem and modest cap are desirable.
The useful middle ground
Moderately reduced fresh-air exchange around young King Oysters encourages the stems to lengthen and the caps to remain compact. The short bag collar helps create this local environment. Stronger fresh-air exchange produces shorter stems and broader caps.
That does not mean stale air is always better. Excessive carbon dioxide can produce unnaturally stretched, narrow, soft or misshapen stems, delayed cap development and weak growth. The goal is controlled retention, not suffocation.

| What you see | What it usually means | Adjustment |
|---|---|---|
| Thick, firm stems with compact rounded caps | The balance is good | Keep conditions stable |
| Short stems and very broad caps | Fresh-air exchange is strong or the collar is too low | Retain a little more local CO₂ by keeping the collar upright and reducing direct airflow |
| Very long, narrow or bent stems with tiny caps | CO₂ is too high or air circulation is uneven | Increase room or chamber ventilation gradually |
| Fuzzy bases with weak, crowded growth | Stale air, excessive pin numbers or both | Increase ventilation and consider thinning the pin set |
| Cracked or leathery caps | Dry air, warm conditions or direct airflow | Raise humidity and redirect the draught |
How much fresh air compared with Pearl Oyster?
Pearl Oyster generally needs more fresh-air exchange throughout fruit-body development. Its ideal form is a broad fan-shaped cap with a short stem, so long stems are a sign to ventilate more.
King Oyster benefits from less aggressive air exchange, especially while the stems are establishing. Keep the bag collar and allow mild local carbon dioxide retention. As the mushrooms grow, watch their shape and gradually increase ventilation if they become too stretched or narrow.
How to produce fewer, larger King Oysters
A healthy block may create more pins than it can develop into large mushrooms. Commercial growers often thin the crop so water and nutrition are directed into the strongest fruit bodies.
- Wait until the pins are clearly differentiated and the strongest individuals are easy to identify.
- Select two to four well-spaced pins with thick bases and healthy caps.
- Remove weaker crowded pins with clean fingers or a clean tool, taking care not to tear deeply into the substrate.
- Keep the remaining mushrooms humid and monitor their shape as they enlarge.
Leaving one or two mushrooms can produce very large individual stems. Leaving several creates a fuller cluster with somewhat smaller mushrooms. Both are valid; thinning is about choosing the result you want.
Healthy versus unhealthy King Oyster growth
Healthy signs
- White mycelium spreading evenly through grain and hardwood.
- A firm colonised block that holds its shape.
- Compact pins with pale stems and tan caps.
- Stems that feel solid and continue thickening.
- Caps that remain smooth, dry to the touch and gently rounded.
- A clean, mild mushroom smell after opening.
Unhealthy signs
- Bright green, black, strong pink or orange competing growth.
- Slimy grain or wet, greasy substrate patches.
- A sour, rotten or strongly fermented smell.
- Yellow or brown liquid collecting heavily around stalled mycelium.
- Soft, translucent or water-soaked mushroom tissue.
- Pins that repeatedly collapse while conditions remain stable.
Common King Oyster growing problems and how to fix them
| Problem | Likely causes | What to do |
|---|---|---|
| No visible growth after inoculation | Too early, cool grain, poorly distributed culture or weak culture | Check the date and temperature; keep the bag sealed and stable |
| Colonisation starts and stalls | Overheating, wet or compressed grain, contamination or limited gas exchange | Move away from heat, ensure the filter is clear and look for unusual moisture or colour |
| Fully colonised block will not pin | Fruiting area too warm, humidity too low, block immature, weak light or no environmental change | Move into cooler humid conditions with gentle light and controlled ventilation |
| Too many tiny mushrooms | Large pin set competing for the block's water and nutrition | Thin to a few strong, well-spaced pins if larger mushrooms are preferred |
| Large caps and short stems | Very strong fresh-air exchange or collar rolled too low | Raise the collar and reduce direct airflow slightly |
| Long, narrow or crooked stems | Excessive CO₂, uneven air movement or crowding | Increase ventilation gradually and thin overcrowded fruit bodies |
| Dry, cracked cap edges | Low humidity, warm conditions or direct fan airflow | Increase ambient humidity and redirect the fan |
| Yellowing or wet blotches | Standing water, poor evaporation or possible bacterial damage | Stop direct spraying, improve gentle air movement and keep caps from remaining wet |
| Green mould | Competing mould has sporulated | Isolate the block immediately; do not open or scrape it indoors |
For help diagnosing a grow, use the free Mushroom Grow Doctor. Include the species, product used, inoculation date, approximate temperatures and clear photographs.
When and how to harvest King Oyster mushrooms
Harvest while the stems are thick, solid and firm and the caps are still slightly rounded. The cap edge can begin to relax, but do not wait until it curls strongly upwards or the tissue becomes soft.
- Support the mushroom close to the base.
- Twist gently and lift, or cut cleanly at substrate level with a clean knife.
- Remove loose stem pieces without gouging the block.
- Trim away any attached substrate before storage.
If several mushrooms are touching, harvesting the group together may cause less damage than pulling each one separately. King Oyster is a culinary mushroom and should be cooked before eating.
Expected flushes and how to encourage a second flush
A healthy King Oyster block can produce more than one flush. The first is usually the largest. A second flush often appears after a rest period, although it may contain fewer or smaller mushrooms.
- Remove all loose mushroom tissue from the first harvest.
- Leave the plastic around the sides of the block.
- Keep the block in a clean, cool area with suitable humidity.
- Allow it to rest while the mycelium recovers.
- Resume pinning humidity and controlled fresh air when new growth appears.
Do not automatically soak an Artisan Mushrooms all-in-one bag unless the supplied instructions tell you to. Pouring or trapping excess water inside the bag can encourage bacterial problems.
How to store King Oyster mushrooms after harvest
- Brush off substrate and keep the mushrooms dry.
- Do not wash them until shortly before cooking.
- Refrigerate at approximately 2-4°C.
- Use a paper bag or another breathable container rather than sealing wet mushrooms in airtight plastic.
- For the best texture, use them within about five to seven days.
Discard mushrooms that become slimy, strongly discoloured or unpleasant smelling.
Frequently asked questions
Are King Oyster mushrooms easy to grow?
They are achievable for a careful beginner, but they are more demanding than Pearl or Blue Oyster. The main challenges are maintaining cool fruiting temperatures and balancing humidity with controlled fresh-air exchange.
How long do King Oyster mushrooms take to grow?
The complete process normally takes several weeks. Grain and hardwood colonisation commonly take longer than aggressive Oyster species, followed by a short consolidation period and then pinning and fruit-body development. Temperature, spawn rate, culture vigour and block size all affect timing.
What is the best substrate for King Oyster mushrooms?
Sterilised hardwood sawdust or pellets supplemented with wheat bran is the best practical choice for indoor cultivation. It provides good structure, moisture retention and nutrition for dense fruit bodies.
What temperature do King Oyster mushrooms need?
Use roughly 20-24°C during colonisation and about 13-18°C for fruiting. Temperatures around 14-17°C are a useful starting point for firm, compact mushrooms, although the ideal range varies by strain.
What humidity do King Oyster mushrooms need?
Aim for roughly 90-95% relative humidity while pins form, then about 85-90% as the mushrooms enlarge. The surface should not remain wet and the caps should not be repeatedly sprayed.
Do King Oyster mushrooms need light?
Yes, but only gentle indirect light. A normal daytime cycle helps pinning and orientation. Strong light and direct sunlight are unnecessary and can dry or overheat the grow.
Do King Oyster mushrooms need a cold shock?
They often benefit from a controlled drop from colonisation temperature into the cooler fruiting range. A severe cold shock or freezing is not required.
Why are my King Oyster caps too large?
Very broad caps with short stems usually mean strong fresh-air exchange and low local carbon dioxide. Keep a short plastic collar around the block and reduce direct airflow slightly while continuing to ventilate the surrounding space.
Why are my King Oyster stems long and thin?
Carbon dioxide may be excessive, airflow may be uneven, or too many mushrooms may be competing. Increase ventilation gradually and consider thinning the pin set. The goal is a thick substantial stem, not an abnormally stretched one.
Should I mist King Oyster mushrooms directly?
Maintain humid air around them rather than repeatedly wetting the pins and caps. Mist the chamber walls or surrounding air as required and allow gentle evaporation. Standing water can damage the fruit bodies.
Can I grow King Oyster from liquid culture?
Yes. Use liquid culture to inoculate sterile grain or a purpose-designed all-in-one hardwood bag with an injection port. Do not inject it into ordinary unsterilised bulk substrate.
Should King Oyster fruit from the side or top of the bag?
Top fruiting is the usual method. Cut the bag open horizontally and leave a short collar above the substrate. A small side X is better suited to clustered Oyster species such as Pearl or Blue Oyster.
How many King Oyster mushrooms should I leave on one block?
For very large individual mushrooms, retain one to three strong pins. For a fuller cluster, leave several. More mushrooms usually means smaller individual fruit bodies because they share the block's available water and nutrition.
Will a King Oyster block produce a second flush?
Often, yes. Clean the surface after the first harvest, maintain suitable conditions and allow the block time to recover. Later flushes are commonly smaller.
Useful cultures and growing supplies
These are the products most directly connected to the methods in this guide. Choose one complete route rather than buying items that duplicate the same stage.
King Oyster Liquid Culture
Fresh Pleurotus eryngii culture for inoculating sterile grain or a compatible all-in-one hardwood bag.
King Oyster Grain Spawn
Fully colonised grain for mixing into sterilised hardwood fruiting substrate.
All-in-One Hardwood Grow Bag
The easiest King Oyster route. Inject the lower grain layer first, then mix the colonised grain through the hardwood inside the sealed bag.
Hardwood and Wheat-Bran Substrate
Use clean, fully colonised King Oyster grain spawn to inoculate this sterilised fruiting substrate.
Related growing guides and free tools
Cultivation references
© 2026 Artisan Mushrooms Ireland. Original article and images. May not be copied or redistributed without written permission.
